
Best Automatic Farms in Minecraft
The best automatic farms in Minecraft are the Iron Farm, Mob Farm, Sugar Cane Farm, Bamboo Farm, Crop Farm, Gold Farm, and Guardian Farm. These farms produce valuable resources with little or no player input, allowing you to spend more time exploring, building, or fighting bosses instead of gathering materials manually. Beginners should start with simple crop and sugar cane farms, while experienced players can maximize efficiency with iron, raid, guardian, and gold farms that generate thousands of items every hour.
Introduction
Every experienced Minecraft player eventually reaches the same point: gathering resources by hand becomes the slowest part of the game.
Mining iron for hours, replanting wheat, chopping bamboo, or hunting mobs may feel rewarding during your first few days. But once you’re building large bases, enchanting gear, or creating mega projects, manual gathering quickly turns into repetitive work.
That’s where automatic farms in Minecraft completely change the experience.
A well-designed automatic farm continuously produces resources while you’re exploring, building, or even standing AFK (away from keyboard). Whether you’re playing Survival alone, on a multiplayer server, or in Hardcore mode, automation saves hundreds of hours over the lifetime of a world.
The beauty of Minecraft automation is that you don’t need complicated redstone to get started. Some of the game’s most productive farms rely on simple mechanics involving villagers, water streams, observers, pistons, or mob AI.
This guide explains the best automatic farms in Minecraft, who should build each one, how they work, when to build them, and the mistakes that often reduce their efficiency.
Whether you’re starting your first Survival world or optimizing an end-game base, you’ll find practical advice that helps you build smarter—not harder.
 Before building advanced farms, beginners should understand the basics covered in our Minecraft Survival tips guide.
Why This Matters
Many players underestimate how much time they spend gathering resources.
Consider these examples:
- Building a large castle can require thousands of stone blocks.
- Creating enchanted diamond or Netherite gear consumes large amounts of experience.
- Trading with villagers requires crops, emeralds, paper, or sticks.
- Redstone machines use enormous amounts of iron.
- Rockets for Elytra consume paper from sugar cane farms.
Without automation, each of these tasks requires constant manual work.
Automatic farms solve several problems:
| Benefit | Why It Matters |
|---|---|
| Saves time | Resources are collected automatically. |
| Improves progression | Better gear arrives much faster. |
| Supports mega builds | Large projects require huge material supplies. |
| Generates XP | Many farms double as excellent experience farms. |
| Enables trading | Villager economies become much easier to maintain. |
| Reduces grinding | Less repetitive gathering means more time playing creatively. |
The earlier you automate resource collection, the faster every other part of the game becomes.
What You Need to Know Before Starting
Not every automatic farm works the same way.
Some rely on redstone circuits.
Others depend on mob spawning mechanics.
Many use villagers, water movement, or specific game rules.
Understanding a few core concepts before you start will save hours of rebuilding later.
Before creating large automation systems, players should know how to find diamonds faster for better tools and armor.
1. Know Your Minecraft Edition
One of the biggest reasons farms fail is following tutorials made for the wrong version.
Minecraft has two main editions:
| Edition | Features |
|---|---|
| Java Edition | Most advanced farms, larger technical community, more complex mechanics. |
| Bedrock Edition | Different spawning rules and redstone behavior. Many Java farms do not work without modifications. |
Always check that a tutorial matches:
- Your Minecraft edition
- Your game version
- Whether you’re playing on Realms or a multiplayer server
Even small game updates can change farm efficiency.
⚠️ Warning: A farm designed for Java Edition may completely fail on Bedrock Edition because of different mob spawning rules and redstone mechanics.
2. Understand Redstone Basics
Redstone is Minecraft’s electrical system.
You don’t need to become an engineer before building farms, but understanding a few components helps tremendously.
Many advanced farms use redstone mechanics, so learning a complete Minecraft redstone guide can help with future builds.
Common Components
| Component | Purpose |
|---|---|
| Redstone Dust | Carries power |
| Redstone Torch | Provides constant power |
| Observer | Detects block updates |
| Piston | Pushes blocks |
| Sticky Piston | Pushes and pulls blocks |
| Hopper | Transfers items |
| Chest | Stores items |
| Comparator | Detects container contents |
| Dispenser | Dispenses items automatically |
Many beginner farms only use hoppers and pistons.
Advanced farms may combine dozens of these components into efficient automation systems.
Once you unlock flight, learn how to get Elytra and fly faster to make farm building and exploration easier.
3. Chunk Loading Matters
Minecraft only processes farms inside loaded chunks.
A chunk is a 16×16 block area where the game actively simulates movement, redstone, crops, and mobs.
If your farm is too far away, it simply stops working.
For best results:
- Build farms near your base.
- Stay within simulation distance.
- Use chunk loaders (Java only) for certain advanced farms.
- AFK in the recommended position when required.
Many players mistakenly think a farm is broken when they’re simply too far away.
4. Light Levels Affect Mob Farms
Hostile mobs require darkness to spawn.
If nearby caves remain unlit, mobs may spawn underground instead of inside your farm.
This reduces efficiency dramatically.
Improve spawn rates by:
- Lighting caves.
- Building high above oceans.
- Building in the sky.
- Using slabs or leaves where needed.
- Following the latest spawning rules for your game version.
To maximize your gear and tools, learn which best enchantments in Minecraft you should prioritize after creating XP farms.
5. Storage Is More Important Than Most Players Realize
Large automatic farms produce resources surprisingly fast.
A productive iron farm can generate stacks of iron ingots every hour.
Guardian farms and gold farms are even faster.
Without proper storage:
- Items despawn.
- Hopper lines clog.
- Collection systems fail.
Use:
- Double chests
- Hopper chains
- Water item transport
- Automatic item sorters
- Overflow protection
Planning storage before building the farm prevents expensive rebuilds later.
💡 Pro Tip: Leave extra space around every farm for future upgrades. Most players eventually expand storage, increase production, or add automatic sorting systems.
6. AFK Safety
Some farms are designed for AFK resource generation.
Before leaving your character unattended:
- Ensure you’re in a safe location.
- Protect yourself from hostile mobs.
- Disable fire hazards.
- Keep pets away from dangerous mechanisms.
- Verify your server’s AFK rules if you’re playing multiplayer.
A secure AFK platform can mean the difference between returning to valuable resources and respawning after an unfortunate creeper explosion.
7. Build Farms in the Right Order
You don’t need every automatic farm immediately.
Building them strategically makes progression much smoother.
A recommended order is:
- Automatic Crop Farm
- Sugar Cane Farm
- Bamboo Farm
- Basic Mob Farm
- Iron Farm
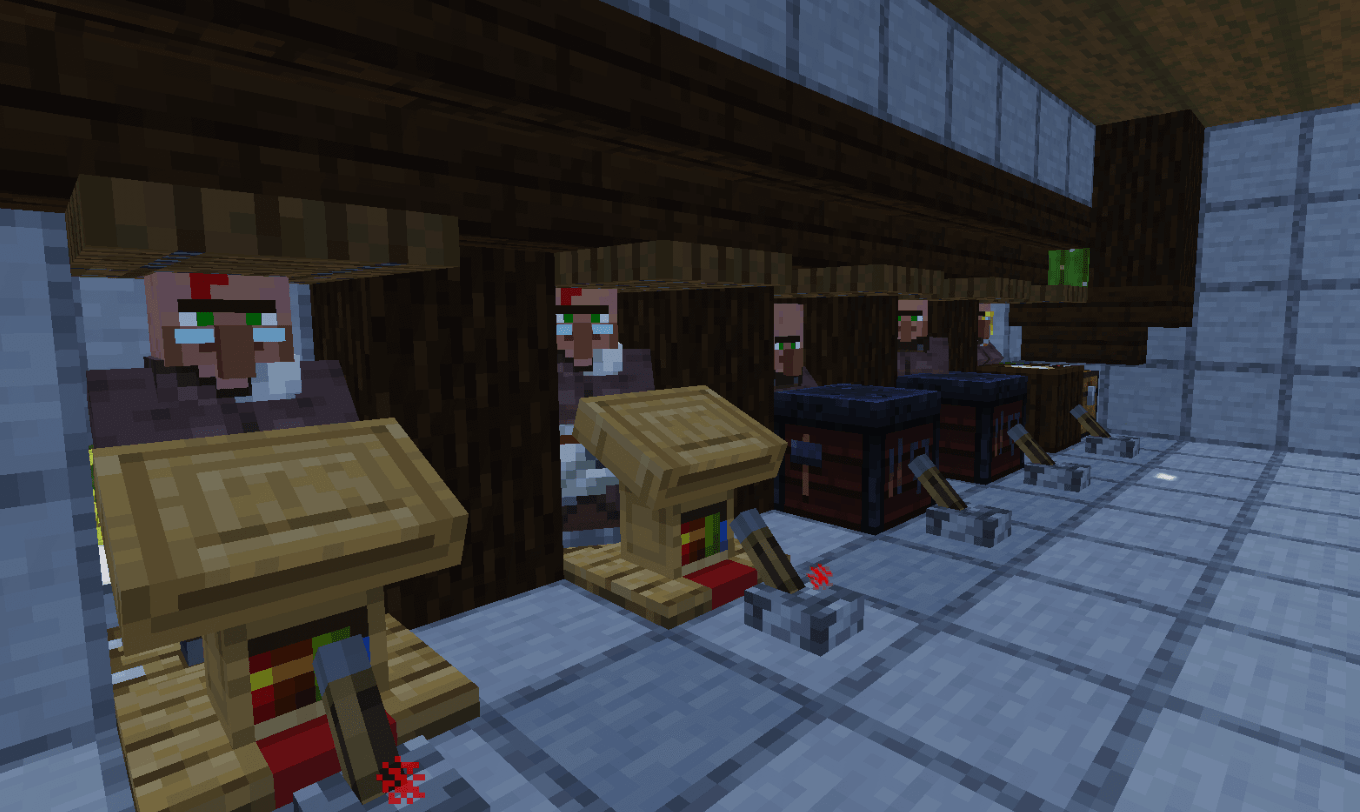
- Villager Trading Hall
- Gold Farm
- Guardian Farm
- Raid Farm
- Specialty farms (Honey, Wool, Moss, Tree, Kelp, etc.)
This progression ensures each new farm supports the next one with the resources you’ll need.
By understanding these fundamentals before placing your first block, you’ll avoid the most common design mistakes and build farms that continue producing resources efficiently throughout your Minecraft world.
In the next section, we’ll build the essential automatic farms every survival player should prioritize, complete with step-by-step instructions, required materials, efficiency tips, and practical examples.
Step-by-Step Guide
The farms below are the backbone of almost every successful Survival world. They are listed in the order most players should build them, balancing simplicity, usefulness, and long-term value.
1. Automatic Crop Farm
Best for: Food, villager trading, emerald farming
Difficulty: ★★☆☆☆
Resources Required
| Item | Approximate Amount |
|---|---|
| Building Blocks | 64+ |
| Water Bucket | 1 |
| Composter | 1 |
| Hopper | 1-2 |
| Chest | 1 |
| Farmer Villager | 1 |
| Seeds | As needed |
| Fence Blocks | Optional |
How It Works
A farmer villager harvests fully grown crops and replants them automatically. Excess crops are either collected by hopper minecarts or shared with another villager, making collection easy.
Because villagers never get tired, this farm continues producing food while you explore elsewhere.
Step-by-Step
Step 1
Create a 9×9 farmland area.
Place a water source in the center.
Hydrate every farmland block.
Step 2
Plant your preferred crop.
Good choices include:
- Wheat
- Carrots
- Potatoes
- Beetroot
Carrots and potatoes generally produce better trading value.
Step 3
Place a composter.
This allows a villager to claim the Farmer profession.
Step 4
Trap one Farmer Villager inside the farm.
Make sure it cannot escape.
Step 5
Create an item collection system.
The easiest method uses:
- Hopper
- Chest
- Water stream
More advanced designs use hopper minecarts beneath the farmland.
Expected Output
| Crop | Approximate Production |
|---|---|
| Wheat | High |
| Carrots | Very High |
| Potatoes | Very High |
| Beetroot | Moderate |
⚠️ Warning
If the farmer’s inventory becomes full, harvesting efficiency can decrease. Some designs intentionally manage villager inventories to maintain consistent production.
💡 Pro Tip
Build your crop farm beside a villager trading hall. Farmers provide emeralds for many crops, creating a reliable income source with almost no manual effort.
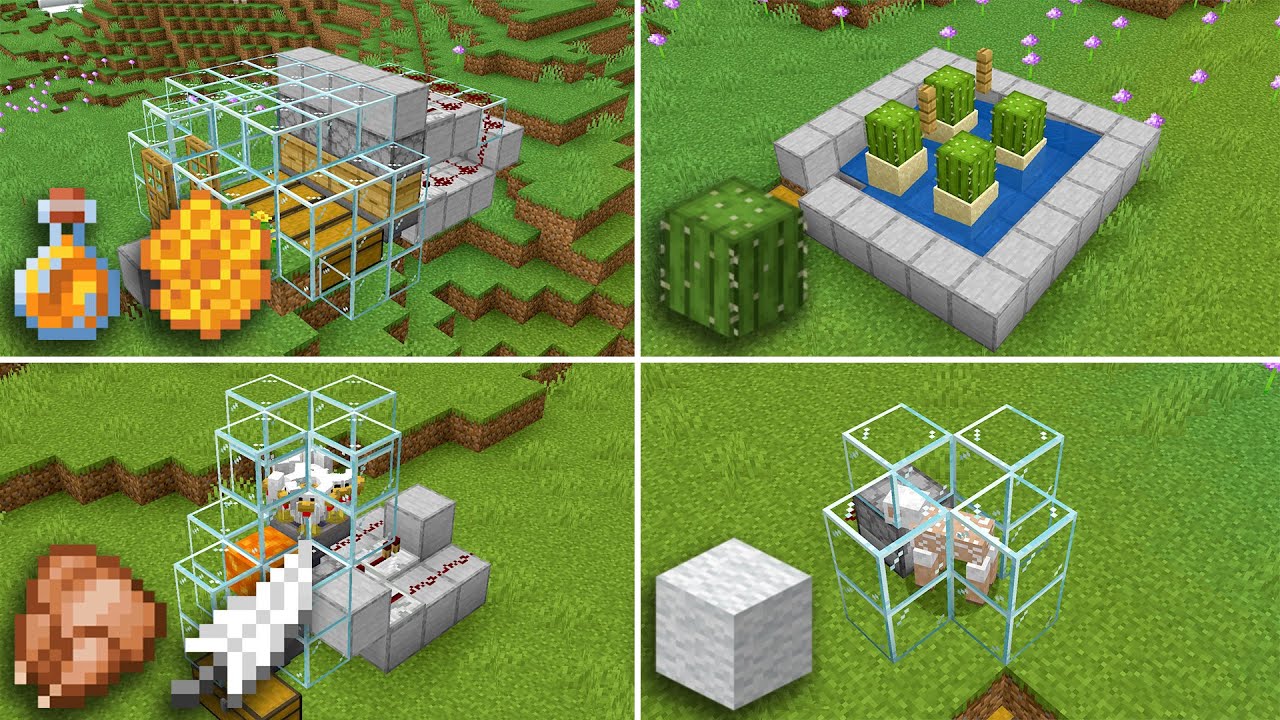
2. Automatic Sugar Cane Farm
Best for: Paper, rockets, books, enchanting
Difficulty: ★★☆☆☆
Sugar cane is one of the most useful renewable resources in Minecraft.
You’ll need enormous amounts for:
- Elytra rockets
- Bookshelves
- Maps
- Librarian trades
- Book crafting
Required Materials
| Item | Amount |
|---|---|
| Observer | Several |
| Pistons | Several |
| Redstone Dust | Several |
| Sand or Dirt | As needed |
| Water | 1 Bucket |
| Hopper | 1 |
| Chest | 1 |
How It Works
Observers detect when sugar cane reaches three blocks tall.
The observer activates pistons.
The pistons break the upper sections.
Items fall into hopper collection systems.
The bottom block remains planted, allowing growth to continue automatically.
Build Steps
1.
Create a straight row of sand.
2.
Place water beside every sand block.
3.
Plant sugar cane.
4.
Install pistons facing the second sugar cane block.
5.
Place observers behind each piston.
Observers should detect growth.
6.
Connect the pistons with redstone.
7.
Install hopper collection.
Lead items into storage chests.
Expected Production
Small farms generate hundreds of sugar cane every hour.
Large versions can produce thousands.
💡 Pro Tip
Build multiple rows rather than one extremely long row.
This makes maintenance easier and improves storage organization.
⚠️ Warning
Never place sugar cane without adjacent water. Growth stops immediately.
3. Automatic Bamboo Farm
Best for
- Fuel
- Scaffolding
- Wood automation
- Smelters
Since Minecraft 1.20+, bamboo has become one of the most valuable renewable resources thanks to bamboo wood blocks.
Required Materials
| Item | Amount |
|---|---|
| Bamboo | Several |
| Pistons | Multiple |
| Observers | Multiple |
| Hopper | 1 |
| Chest | 1 |
How It Works
The observer detects bamboo growth.
Pistons break the stalk.
Collection systems move bamboo into storage.
Because bamboo grows extremely quickly, even compact farms generate impressive output.
Build Steps
- Plant bamboo.
- Install pistons.
- Add observers.
- Connect redstone.
- Build hopper collection.
- Expand horizontally for better production.
Uses
Bamboo can become:
- Fuel
- Sticks
- Bamboo planks
- Bamboo blocks
- Scaffolding
Many late-game players replace coal with bamboo because it’s completely renewable.
💡 Pro Tip
Pair a bamboo farm with an automatic furnace array for unlimited smelting fuel.
4. Automatic Iron Farm
Best for: Iron Ingots
Difficulty: ★★★☆☆
This is widely considered the most valuable farm in Survival Minecraft.
Iron is required for:
- Hoppers
- Rails
- Minecarts
- Buckets
- Anvils
- Beacons
- Redstone components
- Tools
- Armor
Without automation, gathering enough iron for large builds becomes a grind.
Setting up a villager trading guide alongside your farms makes emerald generation and enchanted gear much easier.
Required Materials
| Item | Amount |
|---|---|
| Villagers | 3 |
| Beds | 3 |
| Zombie | 1 |
| Lava | 1 Bucket |
| Water | 1 Bucket |
| Hopper | Several |
| Chests | Multiple |
How It Works
Villagers panic when they see a zombie.
Their panic causes iron golems to spawn.
Water pushes golems into lava.
Iron drops fall into hoppers.
Everything happens automatically.
Step-by-Step
Step 1
Create a secure villager chamber.
Step 2
Add three beds.
Step 3
Place three villagers.
Step 4
Trap one zombie safely where villagers can see it.
Step 5
Build the spawning platform.
Step 6
Use water streams to move iron golems.
Step 7
Create a lava blade.
The lava kills golems.
Step 8
Collect drops using hoppers.
Expected Output
A basic design produces approximately 300–400 iron ingots per hour, while advanced versions can generate well over 1,000 ingots per hour in Java Edition.
⚠️ Warning
Never let the zombie burn in daylight. Cover it with blocks or use a name tag to keep it alive.
💡 Pro Tip
Build your iron farm early. Every future farm requires large numbers of hoppers, and hoppers require iron.
5. Basic Mob Farm
Best for
- Gunpowder
- Bones
- Arrows
- Rotten Flesh
- String
- XP
This is often the first experience farm players build.
Materials
- Building Blocks
- Water Buckets
- Trapdoors
- Slabs
- Hoppers
- Chests
- Torches
How It Works
Hostile mobs spawn inside a dark chamber.
Trapdoors trick mobs into walking off platforms.
Water channels push them into a drop shaft.
Fall damage weakens or kills them.
Loot is collected automatically.
Build Steps
- Build a dark spawning room.
- Add spawning platforms.
- Install water channels.
- Create a vertical drop.
- Build a hopper collection system.
- Add storage.
- Build an AFK platform approximately 100–128 blocks above the ground (depending on your design) to improve spawn efficiency.
Loot
A mob farm provides:
- Bones
- Arrows
- Gunpowder
- Spider Eyes
- Rotten Flesh
- String
- Experience
Gunpowder becomes especially valuable once you obtain an Elytra because you’ll need fireworks for flight.
Farm Comparison
| Farm | Difficulty | Best Resource | Build Early? |
|---|---|---|---|
| Crop Farm | Easy | Food | ✅ Yes |
| Sugar Cane | Easy | Paper | ✅ Yes |
| Bamboo | Easy | Fuel | ✅ Yes |
| Iron Farm | Medium | Iron | ✅ Absolutely |
| Mob Farm | Medium | XP & Loot | ✅ Yes |
Which Farm Should You Build First?
If you’re just starting a new Survival world, follow this progression:
- Automatic Crop Farm – Ensures a steady food supply and supports villager trading.
- Sugar Cane Farm – Provides paper for books, maps, and Elytra rockets later in the game.
- Bamboo Farm – Offers renewable fuel and bamboo wood for future builds.
- Iron Farm – Unlocks large-scale automation by supplying iron for hoppers, rails, and redstone components.
- Mob Farm – Generates XP, gunpowder, bones, and other essential drops for enchanting and exploration.
Advanced Automatic Farms
Once you’ve built the essential farms, it’s time to invest in large-scale automation. These farms require more preparation and resources, but they also deliver some of the highest yields in Minecraft. They’re ideal for late-game Survival worlds, multiplayer servers, and players working on massive builds.
💡 Pro Tip: Before tackling any advanced farm, make sure you have a reliable Iron Farm, plenty of building blocks, and an Elytra if possible. Flying makes construction and maintenance much easier.
6. Automatic Gold Farm
Best for: Gold Ingots, Gold Nuggets, XP, Bartering
Difficulty: ★★★★☆
Why Build a Gold Farm?
Gold becomes incredibly valuable in the late game.
Some farms require Nether resources, so prepare by learning how to explore the Nether safely.
You’ll need it for:
- Powered Rails
- Golden Apples
- Golden Carrots
- Piglin bartering
- Powered Redstone builds
- Decorative blocks
A Gold Farm also provides one of the fastest renewable XP sources in the game.
Required Materials
| Item | Approximate Amount |
|---|---|
| Magma Blocks | 200+ |
| Building Blocks | Several Stacks |
| Trapdoors | 50+ |
| Turtle Eggs | 2–4 |
| Hoppers | Several |
| Chests | Multiple |
| Slabs | As Needed |
How It Works
Zombie Piglins are attracted to turtle eggs.
As they attempt to reach them, they fall into a central killing chamber.
Depending on the design, mobs are either:
- Killed automatically
- Left with low health for manual XP farming
Loot is collected by hopper systems beneath the chamber.
Step-by-Step
Step 1
Travel to the Nether roof (Java Edition) or build safely above a Nether lava lake where spawning conditions are favorable.
Step 2
Construct large spawning platforms using magma blocks.
Step 3
Place turtle eggs in protected locations.
Step 4
Install trapdoors to guide Zombie Piglins toward the drop.
Step 5
Build the drop shaft and killing chamber.
Step 6
Install hopper collection and large storage.
Step 7
Create a safe AFK platform.
Expected Output
| Resource | Approximate Yield |
|---|---|
| Gold Nuggets | Extremely High |
| Gold Ingots | High |
| Rotten Flesh | High |
| XP | Excellent |
⚠️ Warning
Gold Farms generate huge numbers of items. Without enough storage or an overflow disposal system, hoppers can clog and reduce efficiency.
💡 Pro Tip
Connect your Gold Farm to a Piglin bartering setup. Excess gold can be exchanged automatically for useful items like quartz, blackstone, gravel, crying obsidian, and Ender Pearls.
7. Guardian Farm
Best for: Prismarine, Sea Lanterns, XP
Difficulty: ★★★★★
Many experienced players consider the Guardian Farm the most powerful late-game resource farm.
Large farms become much more useful when combined with the best XP farms for repairing enchanted equipment.
It supplies:
- Prismarine
- Prismarine Bricks
- Dark Prismarine
- Sea Lantern materials
- Fish
- Huge amounts of XP
Before You Start
You’ll need to locate and clear an Ocean Monument.
This means defeating Elder Guardians and draining or working around the monument’s water.
Materials
- Building Blocks
- Soul Sand
- Water Buckets
- Hoppers
- Chests
- Signs or Gates
- Glass (optional)
How It Works
Guardians naturally spawn inside the monument area.
Water channels move them into bubble columns.
Bubble columns carry them into a killing chamber.
Drops are collected automatically.
Build Steps
- Defeat the Elder Guardians.
- Secure the monument.
- Build spawning chambers.
- Add bubble elevators.
- Create the killing chamber.
- Install hopper collection.
- Add an AFK platform.
Expected Output
Guardian Farms can generate thousands of items per hour, depending on the design and edition.
💡 Pro Tip
Guardian Farms are one of the fastest ways to gain experience. If you’re frequently repairing enchanted tools with Mending, this farm can save hours of grinding.
⚠️ Warning
Constructing a Guardian Farm is a major project. Gather plenty of food, water-breathing potions, and blocks before you begin.
8. Raid Farm
Best for: Emeralds, Totems of Undying, Redstone, Rare Loot
Difficulty: ★★★★★
Raid Farms are among the most rewarding—but also the most complex—automatic farms in Minecraft.
Loot Includes
- Emeralds
- Totems of Undying
- Saddles
- Crossbows
- Redstone Dust
- Glowstone Dust
- Gunpowder
- Witch Drops
How It Works
The player triggers a raid with the Bad Omen effect.
Pillagers spawn in controlled locations.
Water streams and redstone move them into automatic killing chambers.
Loot is sorted into storage.
Build Steps
- Locate or prepare a suitable village.
- Create controlled spawning areas.
- Build villager holding cells.
- Construct the killing chamber.
- Install hopper collection.
- Design a safe AFK area.
Expected Output
| Resource | Yield |
|---|---|
| Emeralds | Excellent |
| Totems | High |
| Redstone | High |
| Glowstone | Moderate |
💡 Pro Tip
Raid Farms pair perfectly with a Villager Trading Hall. The emeralds you earn can immediately be spent on enchanted books, tools, armor, and building materials.
⚠️ Warning
Raid mechanics can change between Minecraft updates. Always verify that the design you’re following is compatible with your game version.
9. Villager Trading Hall
Best for: Enchanted Books, Diamond Gear, Emerald Economy
Difficulty: ★★★★☆
Although it isn’t technically a farm, a Trading Hall is one of the most valuable automated systems in Minecraft.
Once established, villagers become a renewable source of powerful gear and resources.
Benefits
You can obtain:
- Mending
- Unbreaking
- Efficiency
- Silk Touch
- Fortune
- Diamond Armor
- Diamond Tools
- Food
- Building Blocks
Essential Villagers
| Profession | Main Benefit |
|---|---|
| Librarian | Enchanted Books |
| Farmer | Emerald Generation |
| Toolsmith | Diamond Tools |
| Weaponsmith | Weapons |
| Armorer | Diamond Armor |
| Fletcher | Easy Emeralds from Sticks |
Build Steps
- Cure zombie villagers when possible to reduce trade prices.
- Place workstations.
- Assign professions.
- Lock desirable trades by trading once.
- Organize villagers by profession.
- Add minecart or rail access if expanding.
💡 Pro Tip
Many players reroll Librarian trades until they unlock high-value enchantments like Mending or Efficiency V. Doing this early can significantly improve your long-term progression.
Advanced Farm Comparison
| Farm | Difficulty | Best Resource | Build Stage |
|---|---|---|---|
| Gold Farm | Hard | Gold & XP | Late Game |
| Guardian Farm | Very Hard | Prismarine & XP | End Game |
| Raid Farm | Very Hard | Emeralds & Totems | End Game |
| Trading Hall | Medium–Hard | Enchanted Gear | Mid to Late Game |
Choosing the Right Advanced Farm
Different players prioritize different goals. Here’s a quick guide:
| If You Need… | Build This Farm First |
|---|---|
| Unlimited Iron | Iron Farm |
| Fast XP | Gold Farm or Guardian Farm |
| Emeralds | Raid Farm or Trading Hall |
| Firework Rockets | Sugar Cane Farm |
| Building Blocks | Bamboo Farm |
| Prismarine & Sea Lanterns | Guardian Farm |
| Rare Enchantments | Villager Trading Hall |
Combining Farms for Maximum Efficiency
The most efficient Minecraft worlds don’t rely on a single farm—they combine several systems to support each other.
For example:
- Iron Farm + Bamboo Farm: Produce the materials needed for hoppers, rails, and renewable furnace fuel.
- Crop Farm + Trading Hall: Generate crops that can be traded for emeralds, creating a steady economy.
- Gold Farm + Piglin Bartering: Turn excess gold into quartz, gravel, blackstone, and other valuable resources.
- Mob Farm + Sugar Cane Farm: Supply gunpowder and paper to craft fireworks for Elytra travel.
- Guardian Farm + Mending Gear: Repair your tools quickly using the abundant XP generated by guardians.
Building interconnected farms creates a self-sustaining base where essential resources are always available.
Beginner Tips
Building automatic farms is exciting, but it’s easy to become overwhelmed by complex redstone tutorials or massive technical builds. The good news is that you don’t need an elaborate setup to enjoy the benefits of automation. Starting with a few simple farms will dramatically improve your Survival experience.
1. Start Small
One of the biggest mistakes new players make is trying to build an enormous farm immediately. Large projects require significant resources, time, and troubleshooting.
Instead, focus on compact farms that solve your immediate needs.
A recommended progression is:
- Crop Farm
- Sugar Cane Farm
- Bamboo Farm
- Iron Farm
- Mob Farm
Each farm provides resources that make the next project easier.
2. Build Close to Your Base
Automatic farms only work when their chunks are loaded.
Building essential farms within your main base area allows them to operate while you’re crafting, organizing storage, or expanding your home.
Avoid scattering farms thousands of blocks apart unless you specifically plan to AFK at each location.
A good farm deserves a great base, so check these Minecraft building ideas for inspiration when designing your world.
3. Organize Storage Early
Every automatic farm eventually fills chests.
Label storage clearly and dedicate separate areas for:
- Crops
- Mob Drops
- Iron
- Bamboo
- Sugar Cane
- Valuable Items
Organized storage saves time and prevents accidentally destroying valuable resources.
4. Learn One Redstone Component at a Time
Redstone can seem intimidating, but most farms repeatedly use the same few components.
Learn how these work first:
- Observer
- Hopper
- Comparator
- Piston
- Sticky Piston
Once you’re comfortable with these, even advanced farm tutorials become much easier to understand.
5. Test Before Decorating
Many players build beautiful structures around a farm before confirming it works correctly.
Run the farm for 15–30 minutes first.
Verify that:
- Items reach storage.
- Mobs spawn correctly.
- Villagers behave as expected.
- Redstone activates consistently.
Only then should you decorate the exterior.
⚠️ Warning
Never build decorative roofs or walls that accidentally block spawning spaces, water flow, or redstone signals. Test functionality before aesthetics.
Advanced Tips
Once you’ve mastered the basics, you can dramatically increase production by optimizing your farm designs.
1. Build Farms That Work Together
The best Minecraft bases operate like factories.
For example:
| Farm | Supports |
|---|---|
| Iron Farm | Hoppers, Rails, Minecarts |
| Bamboo Farm | Furnace Fuel |
| Sugar Cane Farm | Rockets & Books |
| Crop Farm | Villager Trading |
| Gold Farm | Piglin Bartering |
| Mob Farm | Fireworks & Bone Meal |
Instead of viewing farms individually, think of them as connected systems.
2. Upgrade Storage
Late-game farms generate resources much faster than beginners expect.
Improve storage using:
- Automatic item sorters
- Overflow protection
- Bulk storage rooms
- Water item transport
- Shulker Box loading systems (late game)
Large storage systems reduce maintenance and keep farms running for longer periods.
3. Reduce Hopper Lag
Hoppers constantly check for nearby items.
Large hopper networks can affect game performance.
Improve efficiency by:
- Locking unused hoppers with redstone.
- Using water streams for long-distance transport.
- Replacing unnecessary hopper chains with ice paths and packed ice.
- Keeping collection systems compact.
4. AFK Efficiently
Many farms produce their best results while the player remains nearby.
Create dedicated AFK platforms that are:
- Safe from hostile mobs
- Close enough to load the farm
- High enough for optimal spawning (where applicable)
This is especially important for Mob Farms, Guardian Farms, and Gold Farms.
5. Plan for Expansion
Leave empty space around every farm.
Many players later decide to:
- Double production
- Add storage
- Connect sorting systems
- Decorate the build
- Upgrade collection methods
Planning ahead avoids expensive rebuilding later.
💡 Pro Tip
When designing your base, reserve an “Industrial District” where all major farms are grouped logically. This makes navigation, maintenance, and future expansion much easier.
Java vs. Bedrock Optimization
Although Java Edition and Bedrock Edition share the same core gameplay, their technical mechanics differ in important ways.
Spawn Mechanics
| Feature | Java Edition | Bedrock Edition |
|---|---|---|
| Mob Spawning | Highly predictable | Different spawning rules |
| Redstone | More consistent | Some timing differences |
| Technical Farms | Greater variety | Often requires modified designs |
| Chunk Loading | Easier to manipulate | More limited |
Always verify that a farm tutorial matches both your edition and game version.
Redstone Differences
Java players often use:
- Quasi-connectivity
- Zero-tick timing (legacy designs)
- Complex flying machines
Many of these mechanics either behave differently or do not exist in Bedrock Edition.
If you’re playing Bedrock, look specifically for Bedrock-compatible designs rather than copying Java tutorials block-for-block.
Common Mistakes
Even experienced players occasionally make these errors.
1. Following Outdated Tutorials
Minecraft updates frequently change:
- Mob spawning
- Villager mechanics
- Raid behavior
- Redstone timing
Always check the tutorial’s supported version before building.
2. Ignoring Light Levels
Mob Farms perform poorly if nearby caves remain dark and full of spawnable spaces.
Lighting underground caves can dramatically improve farm efficiency.
3. Underestimating Storage
Nothing is more frustrating than returning to discover valuable items have despawned because your chests filled up.
Always overbuild storage rather than underbuild it.
4. Incorrect AFK Distance
Standing too close—or too far—from a farm can reduce or even stop production.
Read the recommended AFK distance for each specific design.
5. Poor Villager Management
Villagers require:
- Beds
- Workstations
- Safe movement
- Protection from zombies (unless intentionally used in a controlled iron farm)
Improper placement often causes farms to stop functioning.
6. Building in the Wrong Biome
Some farms perform much better in specific environments.
Examples include:
- Ocean biomes for Mob Farms
- Nether roof for Gold Farms (Java)
- Ocean Monuments for Guardian Farms
Location can significantly affect efficiency.
⚠️ Warning
Before investing hours into a large farm, create a backup of your world. This is especially important if you’re experimenting with unfamiliar redstone or complex technical builds.
Best Farm Layouts and Strategies
Choosing the right location is just as important as choosing the right farm.
Early Game Layout
Keep essential farms close together.
Example:
House

│

├── Crop Farm

├── Sugar Cane Farm

├── Animal Pens

├── Bamboo Farm

└── Storage Room
This minimizes travel time while you’re still developing your world.
Mid-Game Layout
Expand into specialized districts.
Main Base

│

├── Trading Hall

├── Iron Farm

├── Mob Farm

├── Smelting Area

└── Storage Warehouse
Each area has a dedicated purpose, making expansion much easier.
Late-Game Industrial District
Many experienced players build a dedicated automation zone.
Example layout:
Industrial District

├── Iron Farm

├── Gold Farm

├── Guardian Farm

├── Raid Farm

├── Bamboo Farm

├── Super Smelter

├── Item Sorter

└── Bulk Storage
Separating industrial builds from your main base also helps reduce visual clutter and can improve performance by limiting loaded entities in your primary living area.
Performance and Lag Reduction
Large farms can create significant server or client lag if left unchecked.
Reduce Entity Counts
- Kill mobs quickly.
- Collect dropped items promptly.
- Avoid leaving animals in excessive numbers.
Optimize Redstone
Use observers and comparators only where necessary.
Simpler circuits are often more reliable and easier to maintain.
Limit Hopper Usage
Water streams move items without the constant processing cost of long hopper chains.
Control Mob Numbers
Farms that intentionally store hundreds of mobs before killing them can hurt performance.
Process mobs continuously whenever possible.
Storage and Item-Sorting Systems
As your farms grow, manual sorting becomes impractical.
After building multiple farms, organize everything with ideas from our guide on building an automatic storage system.
A basic automatic sorting system includes:
- Hopper line
- Comparators
- Redstone torches
- Repeaters
- Chests
- Filter items
Benefits include:
- Faster organization
- Reduced clutter
- Easier resource management
- Better scalability
For very large worlds, dedicate separate storage wings for:
- Building blocks
- Redstone
- Farming resources
- Mob drops
- Rare items
- Nether materials
- Ocean materials
Farm Expansion Techniques
One of the advantages of well-designed farms is that most can be expanded rather than rebuilt.
Horizontal Expansion
Ideal for:
- Sugar Cane
- Bamboo
- Crop Farms
Simply add more rows while extending collection systems.
Vertical Expansion
Useful for:
- Mob Farms
- Storage Silos
- Certain Crop Designs
Multiple layers increase output without requiring additional land.
Modular Design
Build farms in repeating modules.
Advantages include:
- Easier troubleshooting
- Simpler upgrades
- Flexible expansion
- Consistent resource production
This approach is especially effective for technical players who plan to automate nearly every renewable resource in the game.
By following these optimization strategies, you’ll not only increase the efficiency of individual farms but also create a base that scales smoothly from your first iron ingot to massive late-game industrial projects. In the final part, we’ll answer the most common Minecraft farming questions, summarize the best farms for different playstyles, and provide the complete SEO package—including metadata, internal linking ideas, and FAQ schema suggestions.
Frequently Asked Questions (FAQ)
1. What is the best automatic farm in Minecraft?
The best automatic farm depends on your current goals. For most Survival players, an Iron Farm provides the biggest long-term benefit because iron is required for hoppers, rails, tools, armor, and almost every major automation project.
For beginners, a Crop Farm and Sugar Cane Farm are better starting points because they are simple to build and immediately useful.
For late-game players, Gold Farms, Guardian Farms, and Raid Farms provide some of the highest-value resources in the game.
2. What automatic farm should I build first in Minecraft?
The ideal first automatic farms are:
- Automatic Crop Farm
- Sugar Cane Farm
- Bamboo Farm
- Iron Farm
- Mob Farm
This order gives you food, trading resources, fuel, building materials, iron, XP, and mob drops before moving into complex technical builds.
3. Are automatic farms worth building in Minecraft?
Yes. Automatic farms are one of the best investments in a Survival world because they save time and create renewable resources.
Instead of spending hours collecting materials manually, farms allow you to focus on:
- Building
- Exploring
- Enchanting
- Fighting bosses
- Designing your base
A good farm continues producing resources throughout your entire Minecraft world.
4. Do automatic farms work while you are offline?
No.
Minecraft farms only operate when the area containing the farm is loaded.
If you leave the game completely, most farms stop producing.
However, farms can continue working when:
- You are nearby.
- The chunk remains loaded.
- You are AFK in the correct location.
Some advanced Java Edition setups can keep certain areas loaded, but they require specific mechanics and designs.
5. What is the most profitable farm in Minecraft?
The meaning of “profitable” depends on what you value.
| Goal | Best Farm |
|---|---|
| Emeralds | Raid Farm |
| XP | Guardian Farm / Gold Farm |
| Iron | Iron Farm |
| Rare Items | Raid Farm |
| Building Materials | Bamboo Farm |
| Enchantments | Villager Trading Hall |
For overall usefulness, the Iron Farm remains one of the strongest choices because iron supports nearly every other automated system.
6. What is the easiest automatic farm in Minecraft?
The easiest automatic farms are:
- Sugar Cane Farm
- Bamboo Farm
- Simple Crop Farm
- Chicken Farm
These require minimal redstone knowledge and can be built within the first few days of a Survival world.
7. Do Minecraft farms work on Bedrock Edition?
Yes, but not every farm design works the same way.
Minecraft Bedrock Edition has different:
- Mob spawning rules
- Redstone behavior
- Villager mechanics
- Simulation distance settings
Always use tutorials specifically designed for your edition.
A Java farm copied directly into Bedrock may produce poor results or fail completely.
8. How do I make Minecraft farms more efficient?
To improve farm efficiency:
- Build in the correct location.
- Follow current version mechanics.
- Reduce nearby unwanted mob spawning.
- Improve storage systems.
- Optimize AFK placement.
- Remove unnecessary entities.
- Upgrade collection systems.
Efficiency is usually determined by design, location, and game mechanics—not simply by making the farm larger.
9. Should I build farms near my base?
Yes, especially early-game farms.
Keeping farms near your base provides several advantages:
- Chunks stay loaded while playing.
- Easier maintenance.
- Faster access to resources.
- Better organization.
Late-game players often create separate industrial districts for large farms to reduce clutter and improve performance.
10. What farms are essential for an end-game Minecraft world?
A complete end-game Survival base usually benefits from:
- Iron Farm
- Gold Farm
- Guardian Farm
- Raid Farm
- Villager Trading Hall
- Sugar Cane Farm
- Bamboo Farm
- Mob Farm
- Tree Farm
- Super Smelter
- Automatic Storage System
Together, these create a nearly self-sufficient Minecraft economy.
Final Verdict: The Best Automatic Farms in Minecraft
Automatic farms are one of the biggest upgrades a Minecraft player can make. They transform Survival mode from a constant resource hunt into a creative experience where materials are always available when you need them.
For beginners, the best starting point is simple:
- Build a Crop Farm for reliable food.
- Add a Sugar Cane Farm for paper and future Elytra rockets.
- Create a Bamboo Farm for renewable fuel.
- Build an Iron Farm as soon as possible.
For experienced players, advanced automation is where Minecraft becomes truly powerful:
- Gold Farms provide incredible XP and bartering opportunities.
- Guardian Farms deliver some of the fastest experience generation.
- Raid Farms create an endless supply of emeralds and Totems of Undying.
- Villager Trading Halls unlock the strongest equipment and enchantments.
The best Minecraft farms are not necessarily the biggest or most complicated. They are the ones that solve your problems, save your time, and fit naturally into your world.
A well-planned farm system allows you to spend less time grinding resources and more time doing what Minecraft is best at: building, exploring, and creating unforgettable worlds.